The maps functionality of the app and website allows you to link locations of your sessions, exhibitor booths, and posters to specific areas on the map. When a user taps that location name while looking at the details for the session, exhibitor, or poster, it will show them the linked location on the map. To link your locations on a map, first load the map in your admin.
This article will cover:
Note: if you have an existing map, updating the PDF file will erase all previous links.
To Edit Your Map
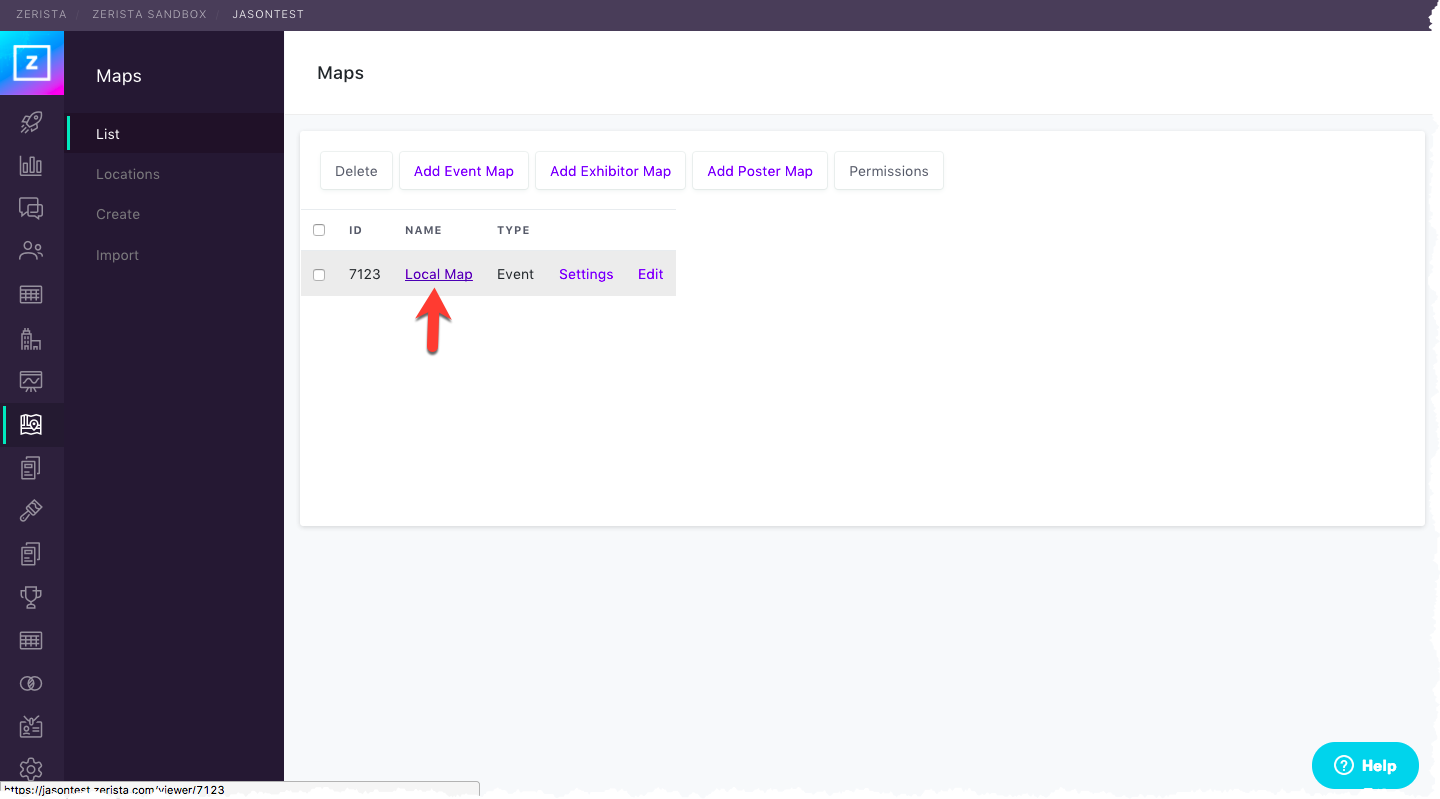
To edit your map in the admin of the site go to maps > list and click on the edit button for that map.
Editing Tools
To link your locations, you will be drawing shapes to define the area that should be linked on your map. Each of these shapes works as a different map layer, which allows them to stack on top of each other like transparencies if necesssary. When you click the edit button for a map, the screen will show you your loaded map with a small menu on the left side. These are the tools for adding shapes (layers) to your map:

+ This button will zoom in on your map.
- This button will zoom out on your map.
1. Draw a Polygon
2. Draw a Rectangle
3. Draw a Marker
4. Edit Layer
5. Delete Layer
Using the Shape Tools to Link Locations
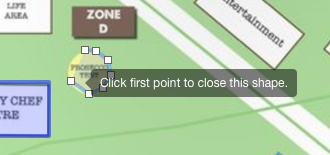
Draw a polygon - This tool will allow you to create custom shapes. Click on each point in the shape you would like to create -- you can approximate curves by using more points. Clicking the starting point to close the shape and prompt you for location data.
To link this shape to a location, enter the name for location provided for the booth, session, or poster location. The name that you enter must exactly match the location name as it's listed in your site (including spaces). You can check this by going to Maps > Locations, or copying and pasting directly from that list.
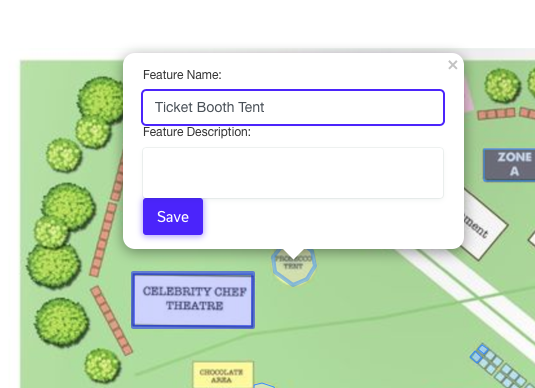
Optionally, you can enter a feature description to include any further information about this location. Once you are done, click save.
Draw a rectangle - Starting in one corner, click and drag the cursor horizontally to the opposite corner. Once your rectangle matches up with the map shape, release the mouse. When you release the mouse, you will be prompted to enter location data.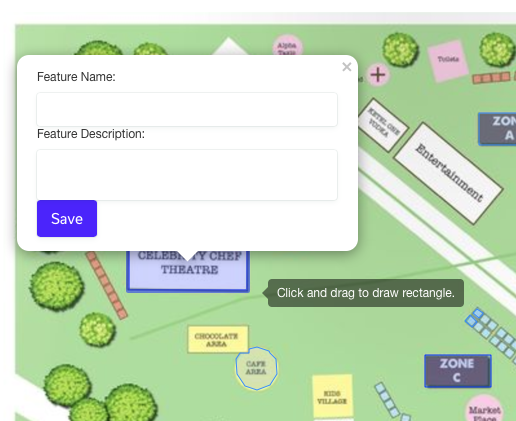
To link this rectangle to a location, enter the name for location provided for the booth, session, or poster location. The name that you enter must exactly match the location name as it's listed in your site. You can check this by going to Maps > Locations, or copying and pasting directly from that list.
Draw a Marker – This tool allows you to drop a marker (similar to a pin in Google Maps) instead of drawing a shape, and is useful for general areas that lack clear boundaries. Markers only work on venue and poster maps — they do not work on exhibitor maps. To add a marker, click the marker tool and then where you'd like the marker to appear.
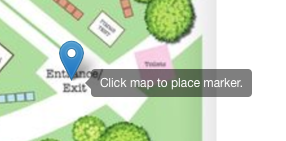
As above, you can then link this marker to a specific location by matching the name exactly or copy/pasting it from your list of locations.
Feature Data - Entering Location Information

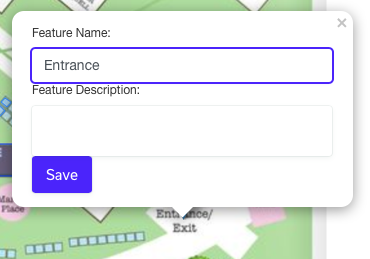
Feature Name - The name of the location, which must be an exact match to the name of the location as listed on your booth, session, or poster location. You can check this by going to Maps > Locations, or copy and paste from that list. This field is required to save a location link.
Feature Description - A description of the location. This is field is optional.
Editing The Shapes
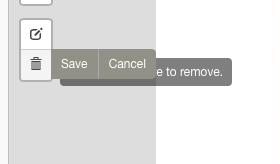
Edit – This button allows you to modify any shapes that you need to tweak. Click the edit button and then drag any of the square points on the map to make changes to your shape.
*Note: If you need to edit the Feature Name or Description, you will need to delete the shape and redraw it.
Delete – This button allow you to delete a shape/layer. Click the delete button and click the shape you would like to delete to remove it. You can continue to delete as many shapes as you want by clicking on them. Once you have removed all unwanted shapes, click the save button attached to the toolbar.
View the Live Map
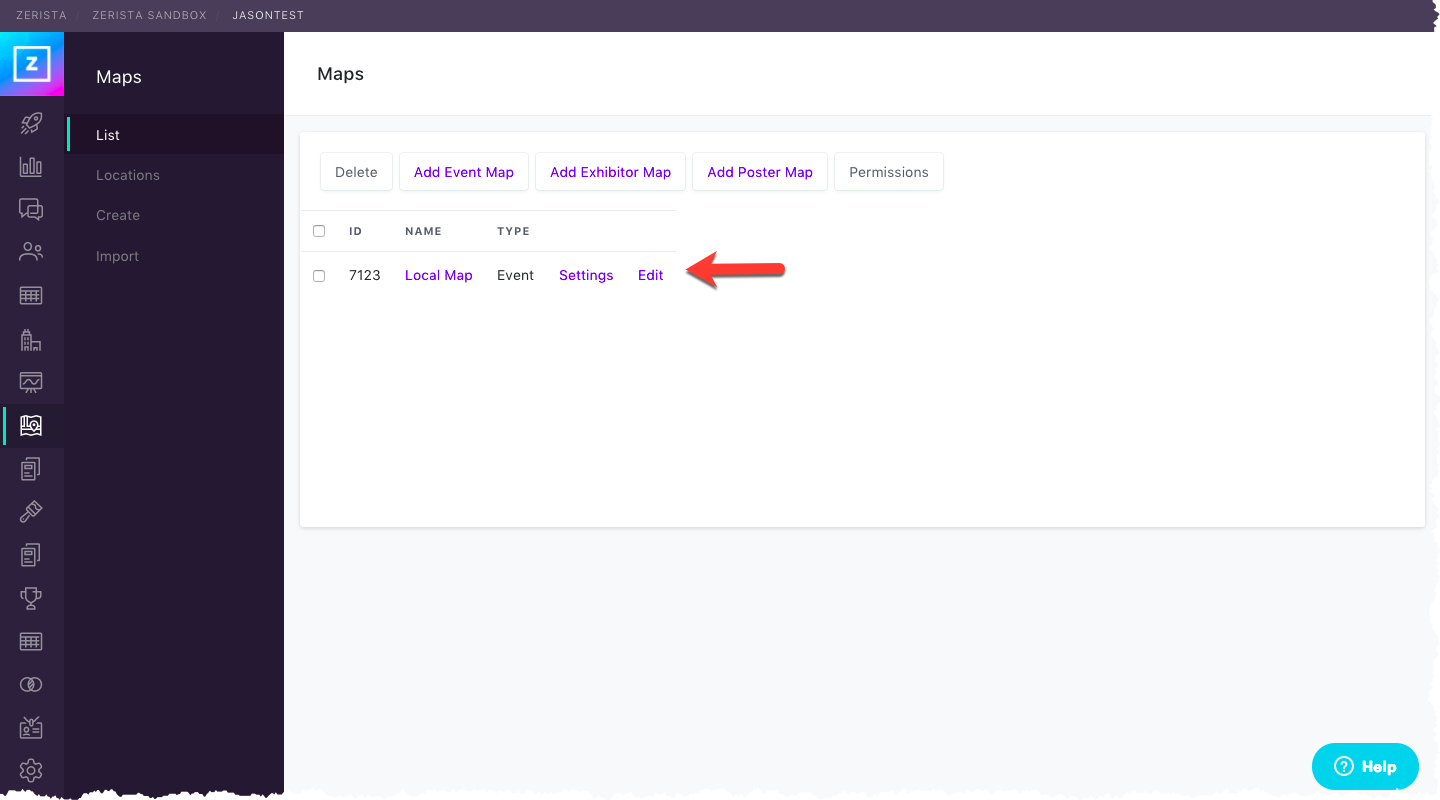
To view the map onsite, go to your Admin > Maps > List. Click the name of the map that you'd like to view to see it as it appears on your site.